A meat thermometer is the gold standard for checking chicken — no argument there. But what if you don’t have one? Maybe it broke, maybe you’re at a vacation rental, maybe you just never bought one. Undercooked chicken is genuinely dangerous (salmonella and campylobacter are no joke), so “I think it’s done” isn’t good enough. Here’s how to know when chicken is fully cooked without a thermometer, using multiple checks together — because no single visual cue is reliable alone.
Why This Matters: The Safety Numbers
Chicken is safe at 165°F (74°C) internal temperature — that’s the USDA’s definitive number for all poultry, no exceptions. Every method below is trying to confirm you’ve hit that temperature without measuring it directly. Important honesty: these methods are good, but a $12 instant-read thermometer is better, faster, and removes all doubt. If you cook chicken regularly, buy one. Until then, here’s the multi-check system.
Check #1: Cut Into the Thickest Part
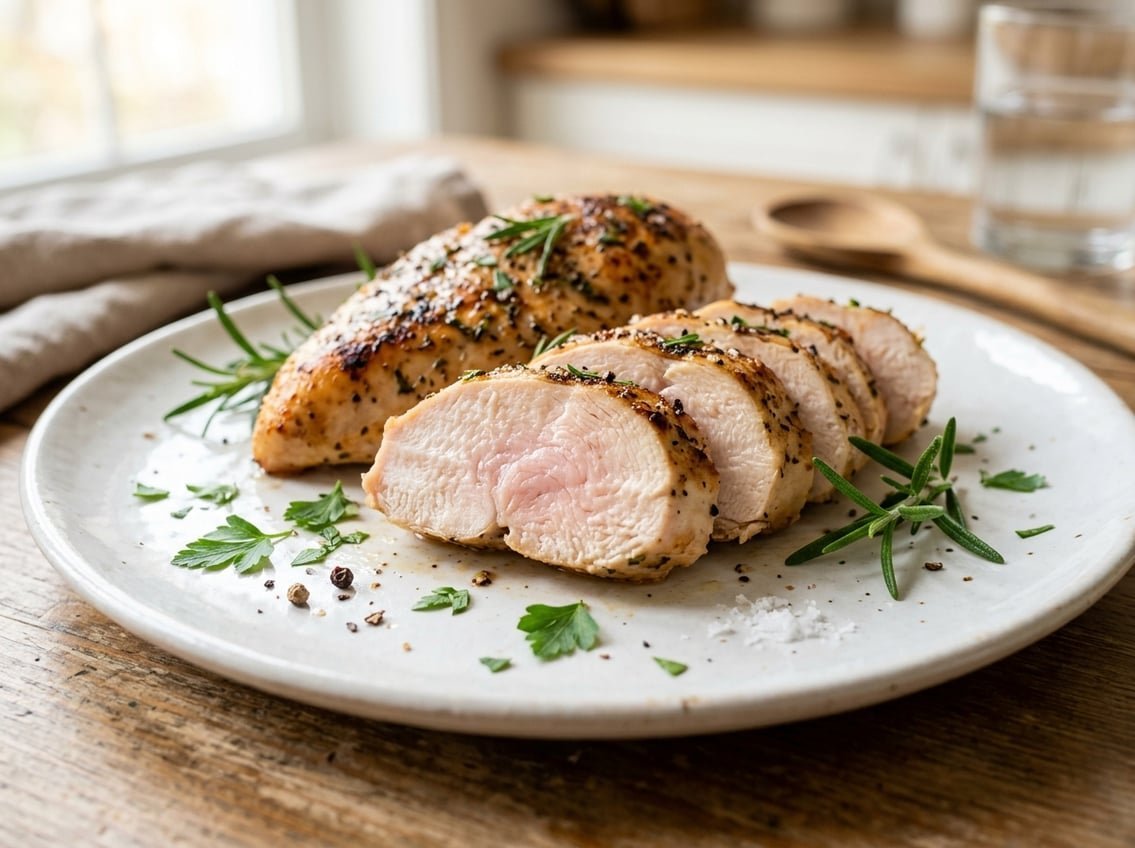
The most reliable no-thermometer method: cut into the thickest part of the meat (for breasts, the center; for thighs, near the bone) and look:
- The meat should be opaque white all the way through — no translucent, glossy, or pink areas. White meat (breast) turns from pink-translucent to solid white; dark meat (thighs) goes from reddish-pink to a grayish-brown.
- The juices should run clear — pierce the thickest part and watch the juices. Clear = done. Pink or red juices = keep cooking.
Caveats: some brined or smoked chicken can stay pinkish even when safe (the “smoke ring” effect), and very young chickens’ bones can leach pink color into nearby meat. That’s why you never rely on this check alone.
Check #2: Texture and Firmness
Raw chicken is soft, squishy, and jelly-like. Fully cooked chicken is firm and springs back when pressed. With experience, the poke test becomes surprisingly reliable:
- Press the thickest part with tongs or a finger (clean!). Raw/undercooked = soft with no resistance. Done = firm with slight give, similar to pressing the base of your thumb when you touch thumb to middle finger.
- The meat should not feel rubbery-bouncy (that’s overcooked) or soft and yielding (undercooked). You’re aiming for firm with a little spring.
- For bone-in pieces: the meat should start pulling away from the bone slightly, and the leg joint should move freely.
This takes practice — which is why it pairs with the cut test, not replaces it.
Check #3: Time + Method (The Sanity Check)
Use expected cooking times as a backstop. If your chicken breast has been on medium heat for 6 minutes and “looks done,” it probably isn’t — that’s the danger zone of wishful thinking:
- Boneless breasts (6–8 oz): 6–8 minutes per side on medium-high, or 20–25 minutes at 425°F
- Bone-in thighs: 35–45 minutes at 425°F, or 8–10 minutes per side on the grill
- Whole chicken (4 lbs): ~1 hour 15 minutes at 425°F
- Ground chicken: 8–10 minutes, broken up, until no pink remains anywhere
If your time is way under these and it “looks done,” it’s not done. Time is the check that catches overconfidence.
The Golden Rule: When in Doubt, Cook It More
With chicken, the asymmetry of error is extreme: slightly overcooked chicken is dry and disappointing; undercooked chicken can put you in bed for a week. If any check is ambiguous, keep cooking. Cut it open, verify, and if unsure, give it 5 more minutes. Rest the meat 3–5 minutes after cooking too — carryover heat finishes the job and redistributes juices.
And for juiciness insurance while you’re being cautious: brine chicken (even 30 minutes in salted water) or use a marinade — both add a huge margin against dryness, so “cook it more to be safe” doesn’t mean “eat sawdust.”
Methods That DON’T Work (Myths to Ignore)
- “Juices run clear” alone — helpful but not sufficient; surface juices can run clear while the center lags
- Color of the outside — beautifully browned exterior, raw interior is the classic grill failure
- Floating in boiling water/oil — an old wives’ tale with no food-safety basis
- Cutting repeatedly during cooking — loses juices without adding information; check once, near the end
Brining and Marinating: Insurance Against Dryness
The best defense against dry chicken is starting with juicy chicken. Wet brining (1 quart water + 1/4 cup salt + 2 tablespoons sugar per 4 chicken breasts, 30 minutes to 2 hours) adds moisture insurance that survives even slight overcooking. Dry brining (salt the chicken generously, refrigerate uncovered 1–24 hours) does the same with less fuss and crispier skin — the salt draws out moisture, then the chicken reabsorbs it seasoned.
Marinades add flavor more than juiciness (they don’t penetrate deeply despite the myth), but acidic marinades (yogurt, buttermilk, citrus) do tenderize the surface. 30 minutes to 4 hours is the sweet spot; beyond 24 hours, acids turn the texture mushy. Yogurt marinades deserve special mention — the lactic acid is gentle, the coating promotes beautiful browning, and it’s the secret behind great tandoori-style chicken.
Whatever method you use, pat the chicken dry before cooking — surface moisture is the enemy of browning. Dry surface + hot pan = golden crust. Wet surface + hot pan = steamed sadness. This one habit improves every piece of chicken you cook.
Resting Meat: The Step That Finishes the Job
Pull chicken off the heat and rest it 5–10 minutes (tent loosely with foil) before cutting. During cooking, juices migrate toward the center; resting lets them redistribute through the meat. Cut too early and those juices run out onto the board instead of staying in the chicken — the difference between juicy and dry is often just patience.
Carryover cooking is real: internal temperature rises 3–5°F during the rest. Experienced cooks pull chicken at 160–162°F and let carryover take it to 165°F — juicier results with the same safety. Without a thermometer, just rest the full 10 minutes; the residual heat completes the cooking gently and evenly.
The Bottom Line
To know when chicken is fully cooked without a thermometer: cut into the thickest part (opaque, no pink), check that juices run clear, confirm firm-springy texture, and sanity-check against expected cooking times. Use all of them together, and when in doubt, cook it longer — dry chicken beats dangerous chicken every time. But honestly? A $12 instant-read thermometer ends the guessing forever. It’s the best $12 in any kitchen. For more chicken confidence, see our easy high-protein meals, meal prep cost guide, and budget family dinners — chicken stars in all of them.