The caulk around your bathtub is the unsung hero of your bathroom — it’s the only thing standing between shower water and the wall cavity behind your tub. When it fails, water sneaks behind tiles, subfloors rot, and mold throws a party you didn’t invite it to. Choosing the right caulk matters more than most people think, because the wrong type cracks, mildews, or peels within months. Here’s what is the best caulk to use around a bathtub, and how to apply it so it lasts years instead of months.
The Winner: 100% Silicone Caulk
For bathtubs, 100% silicone caulk is the best choice, full stop. Here’s why it beats the alternatives:
- Waterproof, not just water-resistant. Silicone cures into a rubbery, fully waterproof seal — exactly what a constantly-wet tub joint needs.
- Stays flexible forever. Tubs flex and shift slightly with weight and temperature changes. Silicone stretches instead of cracking; rigid caulks don’t.
- Mold and mildew resistant. Quality silicone caulks include biocides that resist the black mildew that colonizes lesser caulks. Look for “mold-free” or “mildew-resistant” plus a 7–10 year mold-free guarantee on the label.
- Lasts 10–20 years when properly applied, versus 2–5 for basic acrylic.
The trade-offs: silicone can’t be painted (buy it in the color you want — white, clear, or almond), it requires mineral spirits for cleanup, and old silicone must be completely removed before re-caulking (new silicone doesn’t stick to old silicone). These are minor inconveniences for a vastly superior seal.
What About “Siliconized Acrylic” or Kitchen-and-Bath Caulk?
You’ll see tubes labeled “siliconized” acrylic latex marketed for kitchens and baths. They’re easier to apply and paintable, which is why DIYers like them. But they’re a compromise: less flexible, less waterproof, and shorter-lived than pure silicone. They’re fine for low-moisture joints (around a vanity backsplash, for instance), but for the tub-to-tile and tub-to-wall joints that get soaked daily, pure silicone wins. Don’t let the easier application talk you into an inferior seal where it matters most.
This Old House’s bathtub caulking guide agrees: 100% silicone for wet areas, applied to a clean, dry joint.
How to Apply Bathtub Caulk Like a Pro
Application quality matters as much as product choice. The pro method:
Step 1: Remove ALL old caulk
This is the step everyone rushes, and it’s the most important. Use a caulk remover tool or utility knife to get every trace of old caulk out. For silicone residue, a dedicated silicone remover solvent helps. The joint must be down to clean tile/tub — new caulk over old caulk fails fast.
Step 2: Clean and dry thoroughly
Scrub the joint with a mold-killing cleaner, rinse, and let it dry completely — ideally 24 hours. Caulk applied to damp joints doesn’t bond. Run the exhaust fan; stuff the gap with paper towels overnight if needed to wick moisture.
Step 3: Fill the tub with water
Pro trick: fill the tub before caulking. The weight pulls the tub down slightly to its loaded position — caulk applied to an empty tub can crack when the tub flexes under a person + water. Leave the water in until the caulk cures.
Step 4: Tape, caulk, tool
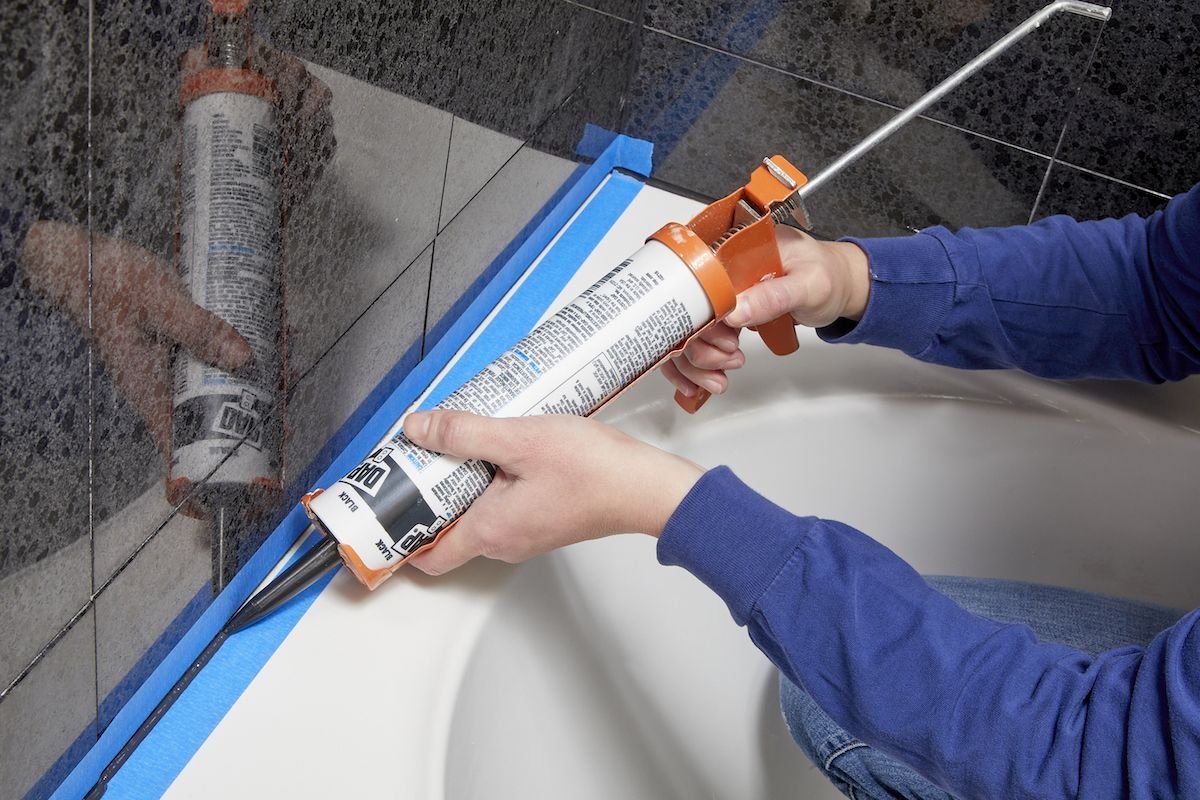
Apply painter’s tape on both sides of the joint for crisp lines. Cut the tube tip small — you can always cut bigger. Apply a steady, continuous bead, then tool it smooth with a wet finger or caulk tool in one pass. Pull tape immediately while wet.
Step 5: Cure undisturbed
No water contact for 24–48 hours (check the tube). Drain the tub after curing. Admire your work.
Maintaining the Seal
- Ventilate. Run the exhaust fan during and 20+ minutes after showers — constant moisture is what kills caulk and breeds the mold behind it. See our bathroom mold prevention guide.
- Clean gently. Harsh abrasives and bleach degrade caulk over time. Mild cleaners preserve it.
- Inspect yearly. Catch small cracks early — a $8 tube of touch-up beats water damage repair.
- Re-caulk at the first sign of failure: cracking, peeling, or mildew that won’t clean off means the seal is compromised. Don’t wait.
If the grout nearby is also suffering, our grout cleaning guide will help — and if the whole bathroom needs attention, check minor bathroom remodel costs.
Caulk vs. Grout: Knowing Which One Failed
People confuse these constantly, and using the wrong fix wastes a weekend. Grout fills the joints between tiles — it’s rigid and cement-based. Caulk fills the joints where tile meets another material (tub, wall, floor) or at corners — it’s flexible. The rule: any joint where two different planes meet, or where movement happens, gets caulk — never grout. Grout in a tub-to-tile joint cracks within months because the tub flexes; that’s not a grout failure, it’s a wrong-material failure.
If you’re looking at a cracked joint and wondering which it is: grout is hard and sandy; caulk is rubbery and peels. When re-doing a bathroom, replace all the movement joints with 100% silicone caulk and leave the tile-to-tile joints grouted (and sealed). Getting this distinction right is the difference between a seal that lasts a decade and one that fails by spring.
One more spot people miss: the joint where the shower floor meets the walls, and around the shower door frame. These are caulk joints too, and they fail silently — water migrates behind them for months before you see damage. Annual inspection of every caulk line in the bathroom takes five minutes and prevents the expensive surprises.
Caulk Color Matching
White is the default, but it’s not always right. Clear silicone disappears against any tile — best for patterned or dark tiles where white lines would stand out. Almond/biscuit matches warm-toned fixtures better than stark white. Gray suits modern gray-tile bathrooms. The rule: match the caulk to the lighter of the two surfaces it joins — it reads as a clean line rather than a dark seam. And buy an extra tube; running out mid-bead with a half-caulked tub is deeply annoying.
The Bottom Line
The best caulk to use around a bathtub is 100% silicone with mold resistance — flexible, fully waterproof, and long-lasting. The application matters as much as the product: remove all old caulk, dry the joint completely, fill the tub while caulking, and let it cure undisturbed. It’s a $12 tube and an afternoon’s work protecting against thousands in water damage. One of the highest-value maintenance tasks in your entire house.