
Old houses have character — and old houses have $300 winter heating bills. If you live in a home built before 1990, there’s a good chance it’s leaking energy (and money) in a dozen places. The trick is knowing which upgrades actually pay off versus which ones just feel virtuous. Ranked by bang for buck, here are the best energy-efficient upgrades for an older home, based on Department of Energy data and what actually works in the real world.
1. Air Sealing (Best ROI in Existence)
Before insulation, before windows, before anything: seal the air leaks. The average older home leaks as much air as having a window open 24/7. Caulk, weatherstripping, and a few cans of spray foam around penetrations (pipes, wires, recessed lights, attic hatches) cost $100–$300 in materials and can cut heating/cooling costs 10–20%. It’s sweaty, unglamorous work — mostly in the attic and basement — and it’s the single highest-ROI energy upgrade you can do. The DOE’s air sealing guide shows exactly where to look.
2. Attic Insulation (The Classic for a Reason)
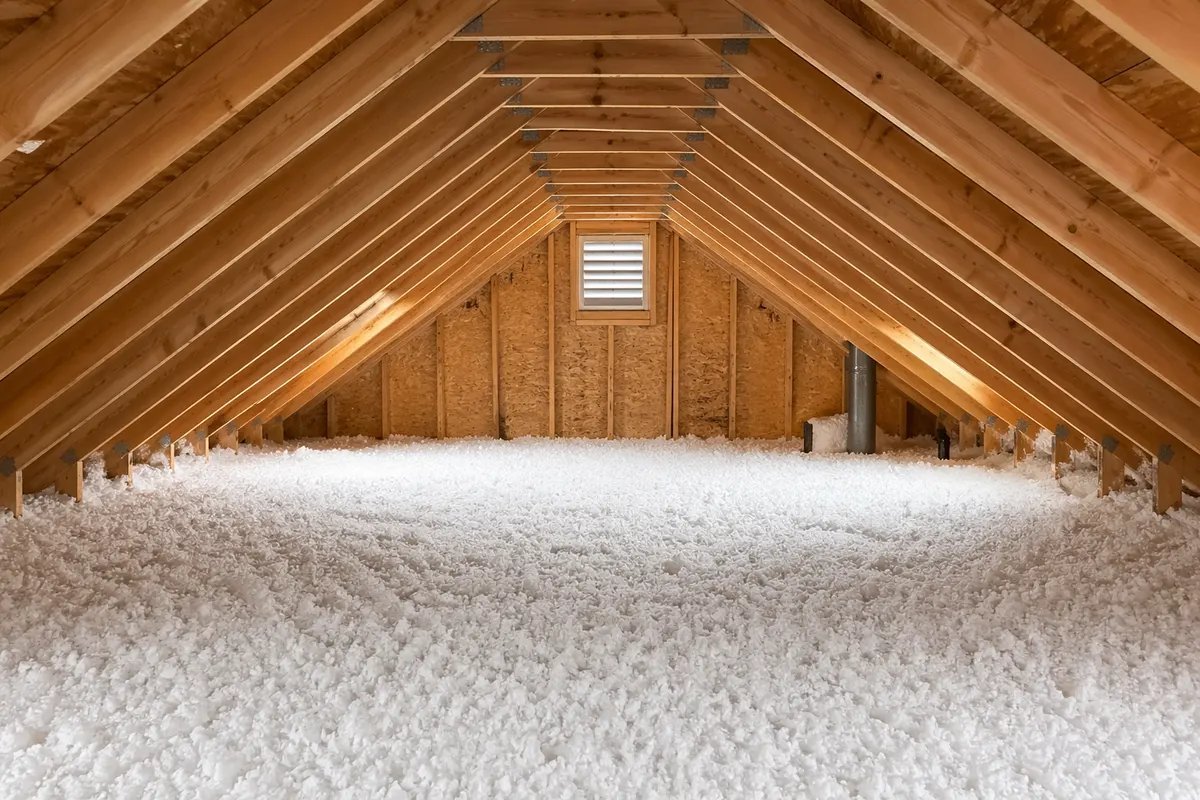
Heat rises, and in under-insulated attics it rises straight out through your roof. Blowing in cellulose or fiberglass to reach R-38 to R-60 (12–18 inches depending on material) costs $1,500–$3,500 professionally for a typical home, or under $1,000 DIY with a rented blower (many home centers lend the blower free with insulation purchase). Payback: 2–5 years in most climates. This is the upgrade energy auditors recommend first in probably 80% of older homes. Our guide to insulating an attic cheaply covers the DIY approach in detail.
3. Seal and Insulate Ductwork
If you have forced-air heating/cooling with ducts in the attic or crawlspace, you’re probably losing 20–30% of your conditioned air to leaks. Mastic sealant or metal tape (not duct tape — ironically, duct tape fails on ducts) on every joint, then insulating the ducts, costs a few hundred dollars and pays back fast. It’s miserable work in a hot attic, so do it in spring or fall.
4. Smart Thermostat ($150–$250)
A smart thermostat saves roughly 8–15% on heating and cooling by learning your schedule and not conditioning an empty house. Installation is a 30-minute DIY job for most systems (check wire compatibility first — older systems sometimes lack a C-wire; adapters exist). Unlike most upgrades, this one starts saving money the day you install it. Many utilities offer $50–$100 rebates, so check before buying.
5. LED Lighting (The “Why Haven’t You Done This” Upgrade)
If you still have incandescents or CFLs anywhere, swap them. LEDs use 75% less energy, last 25x longer, and cost $2–$5 per bulb now. A whole-house swap runs $50–$150 and pays back in under a year. There’s genuinely no reason to wait on this one.
6. Water Heating Upgrades
Water heating is typically 15–20% of home energy use. Cheap wins:
- Lower the tank to 120°F. Free, saves 3–5%, and most tanks are set hotter than needed — the DOE confirms 120°F as the sweet spot for most households.
- Insulate the tank and first 6 feet of hot pipes. $30 in materials, meaningful savings on older tanks.
- When the tank dies, go heat-pump (hybrid). 3–4x more efficient than standard electric; the premium pays back in 2–4 years with current incentives.
7. Windows and Doors (Worth It When They Fail)
New windows are expensive ($8,000–$18,000 whole-house) with long energy paybacks — do them for comfort, noise, and function, not pure ROI. But cheap window-adjacent wins abound: weatherstripping ($50), window film kits in winter ($30), caulking gaps (see our window sealing guide), and door sweeps ($15 each). These capture much of the benefit for 5% of the cost. Full details on window replacement costs if you’re going that route.
8. Appliances (Replace on Failure, Not Before)
A 20-year-old fridge uses roughly twice the energy of a modern ENERGY STAR model — but the payback on early replacement is still long. The smart play: when an appliance dies, buy the efficient replacement. Prioritize the fridge (runs 24/7) and consider heat-pump dryers and induction ranges at replacement time. Check ENERGY STAR’s rebate finder — utility and federal incentives can cut hundreds off efficient appliances.
What About Solar?
Solar is fantastic but it’s step 10, not step 1. Every dollar spent on efficiency first reduces the size (and cost) of the solar system you need later. Seal, insulate, upgrade — then solarize the smaller remaining load. A home energy audit ($200–$500, often subsidized by utilities) will rank all of this for your specific house and is worth every penny before major spending.
Getting a Home Energy Audit (Worth It Before Major Spending)
Before spending thousands on upgrades, consider a professional home energy audit ($200–$500, often subsidized or free through utilities). An auditor runs a blower-door test (measures exactly how leaky your house is), uses infrared cameras to find missing insulation, checks combustion safety, and gives you a prioritized list specific to your house. It’s the difference between guessing and knowing.
What to expect: 2–4 hours, access to attic/basement/all rooms, and a detailed report ranking upgrades by cost-effectiveness. The best auditors are BPI or RESNET certified — check credentials, since “free energy audit” from a company that sells windows is a sales pitch, not an audit. Many utilities maintain lists of approved independent auditors.
The audit often pays for itself immediately: auditors routinely find the one weird thing — the disconnected duct, the uninsulated chase, the attic hatch pouring heat — that a $50 fix resolves. Do the audit first, then spend with confidence instead of hope.
Renters: What You Can Do Without Owning
Renters aren’t powerless on energy — you just work differently. Portable wins: smart power strips, LED bulbs (take them with you), thermal curtains, door draft stoppers, and a smart thermostat if the landlord approves (many do — it protects their HVAC). Ask about the big stuff: some landlords split costs on insulation or window film when you show them the payback math. Document everything you change and get permission in writing — and take your portables when you leave.
The Bottom Line
The best energy-efficient upgrades for an older home, in order: air sealing ($200, massive ROI), attic insulation ($1,500–$3,500, 2–5 year payback), duct sealing, a smart thermostat, LEDs, water heater tweaks, cheap window fixes, and efficient appliances at replacement time. Do the cheap stuff first — the first $500 you spend on air sealing and LEDs will save more than the next $5,000 spent on almost anything else. Efficiency first, then generation.




One Comment