Your garbage disposal is humming but not grinding, leaking from the bottom, or just plain dead — and you’re wondering whether to repair or replace, and what replacement costs. A garbage disposal is one of the simpler appliance swaps in a home, well within DIY reach for most people. Here’s how much it costs to install a new garbage disposal, whether DIY or hired out, and how to choose the right unit.
The Cost Breakdown
- The disposal unit itself: $80–$250. Basic 1/3 HP models start around $80; quality 1/2–3/4 HP units with stainless grinding components run $120–$200; premium 1 HP models reach $250+.
- DIY installation: $0 labor — just the unit plus maybe $10–$20 in supplies (plumber’s putty, wire nuts). Total: $80–$270.
- Professional installation: $150–$350 for labor on a straightforward swap, bringing the total to $250–$600.
- New installation (no existing disposal): $400–$800+ — requires adding a switched outlet under the sink (electrician) and possibly reconfiguring drain plumbing.
A like-for-like swap is genuinely one of the easiest plumbing-electrical DIY jobs: disconnect, unmount, mount new, reconnect. Most first-timers finish in 1–2 hours. Family Handyman’s disposal replacement guide walks through it with photos.
Repair or Replace? The Decision Framework
Try these before buying new:
- Humming but not spinning: Probably jammed. Turn it OFF, then use the hex wrench (that came with it — check under the sink) in the bottom socket to manually free the impellers. Press the red reset button underneath. This fixes the majority of “dead” disposals.
- Leaking from the top: Usually the sink flange seal — re-seat with fresh plumber’s putty ($5 fix).
- Leaking from the side: Check the dishwasher connection and discharge pipe gaskets — often just loose.
- Leaking from the bottom: Internal seal failure — replace the unit. Not repairable.
- Over 10–12 years old: Replace rather than repair. You’re on borrowed time, and new units are quieter and more efficient.
- Frequent resets needed: The motor is struggling — replacement time.
Choosing the Right Disposal
- Horsepower: 1/3 HP is underpowered for most families — it jams constantly. 1/2 HP is the minimum sensible choice; 3/4 HP is the sweet spot for active kitchens; 1 HP for heavy use. The price difference between 1/2 and 3/4 HP is usually $30–$50 — worth it.
- Grind components: Stainless steel lasts far longer than galvanized. Worth the small premium.
- Noise: Sound insulation varies enormously. If your kitchen is open-plan, pay extra for a quieter model — you’ll thank yourself daily. Check decibel ratings and reviews.
- Septic systems: Standard disposals and septics don’t mix well — heavy use overloads the system. If you’re on septic, minimize disposal use or consider a septic-assist model, and be extra diligent about what goes down.
- Batch feed vs. continuous feed: Continuous feed (wall switch) is standard and convenient; batch feed (stopper-activated) is safer with kids but less convenient.
DIY Installation: Key Steps and Safety
- Turn off power at the breaker — disposals are hardwired or plugged into a switched outlet. Verify dead.
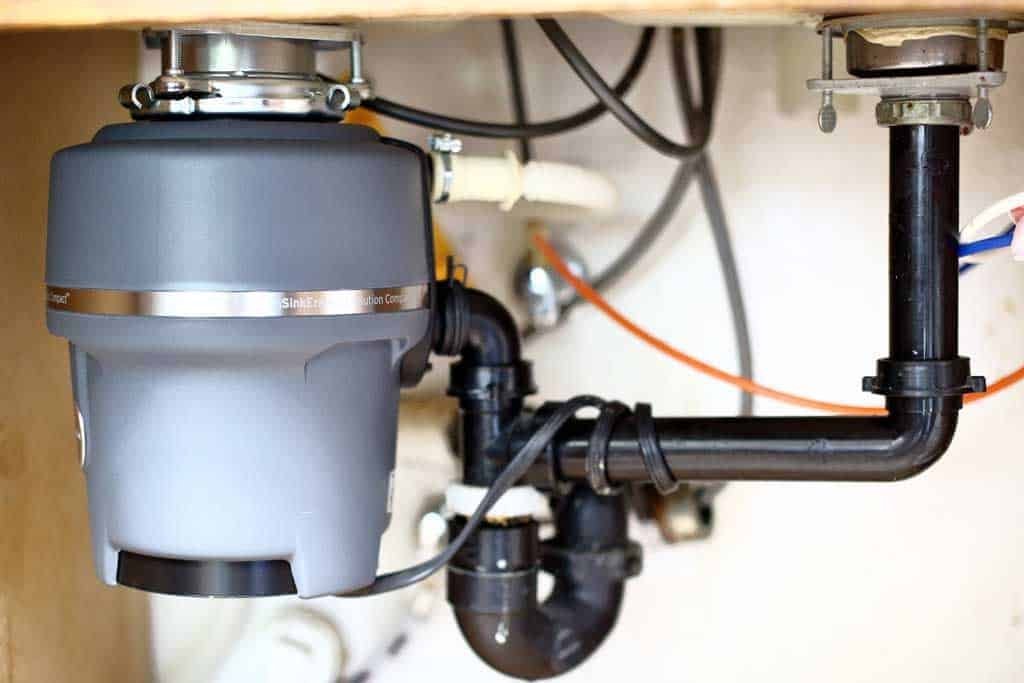
- Disconnect the drain pipes and dishwasher hose; support the old unit while twisting it off the mounting ring (they’re heavy — 15+ lbs).
- Remove the old sink flange, clean off old putty, and install the new flange with fresh plumber’s putty.
- Mount the new disposal to the flange assembly — it twists and locks.
- Connect the electrical (match wire colors, wire nuts, ground screw) and the drain/dishwasher connections.
- Run water and test — check every connection for leaks before calling it done.
Call a pro if: there’s no existing electrical for a disposal, the sink cabinet wiring looks sketchy, or the drain plumbing needs significant reconfiguration. Electrical + water + DIY overconfidence is a bad combination.
Keeping It Alive Longer
- Run cold water before, during, and 15 seconds after grinding — cold keeps grease solid so it gets chopped and flushed rather than coating pipes.
- Feed waste gradually, not all at once.
- Never put down: grease/oil, fibrous foods (celery, artichoke leaves, corn husks), expandable starches (pasta, rice, potato peels in quantity), coffee grounds in bulk, bones (unless rated for them), or non-food items (obviously, but it happens).
- Grind ice cubes and citrus peels occasionally to clean the chamber and freshen smell.
- If drains are slow despite a working disposal, the issue may be downstream — see our guide to unclogging drains without chemicals.
Disposal Alternatives Worth Considering
Before replacing, it’s worth asking whether you even want a disposal. They’re banned or discouraged in some municipalities (septic-heavy areas especially), and they add load to wastewater systems. The alternatives: composting — a countertop bin or outdoor tumbler handles food scraps better than any disposal, producing garden gold instead of sewer load. Strainers — a good sink strainer ($10) catches what you’d grind, emptied into trash or compost in seconds.
Many plumbers quietly note that disposals cause a disproportionate share of kitchen drain calls — they’re convenient but mechanically they’re the weak link in the drain system. If yours dies and you’re on the fence, try living without it for a month with a strainer and compost setup. Plenty of households never look back, and it’s one less appliance to maintain, repair, and replace.
If you keep the disposal, the maintenance habits from the previous section are what determine whether it lasts 8 years or 15. The units that die young are almost always killed by misuse (grease, fibrous foods, no water) rather than manufacturing defects.
What to Do With the Old Unit
Don’t just trash the old disposal — many municipalities classify them as e-waste or scrap metal. Scrap yards often take them free (there’s recoverable metal inside). Habitat ReStore and similar outlets accept working units. And check local disposal rules before putting one in the trash — the motor contains materials landfills don’t want. Recycling it properly takes one extra trip and keeps heavy metals out of the waste stream.
The Bottom Line
Installing a new garbage disposal costs $80–$270 DIY or $250–$600 professionally for a straightforward swap. Before replacing, try the hex-wrench jam fix and reset button — they revive most “dead” units in two minutes. When buying, get at least 1/2 HP (3/4 is better), stainless grinding parts, and enough sound insulation for your kitchen layout. It’s an afternoon project that makes the kitchen noticeably more pleasant — especially paired with fixing that drippy faucet while you’re under the sink anyway.