Be honest: can you actually park in your garage? Or is it a storage unit you pay a mortgage on? The average garage holds $2,000+ worth of stuff nobody can find, stacked in a way that makes every project start with 20 minutes of excavation. Organizing a garage doesn’t require a $5,000 pro system — it requires zones, vertical space, and the discipline to purge first. Here’s the best way to organize a garage on a budget, in a weekend, for a few hundred dollars.
Step 1: Purge Before You Organize (The Hard Part)
Do not buy a single bin before purging. Organizing clutter just makes tidy clutter. Pull everything out (yes, everything — onto the driveway), and sort into four piles:
- Keep and use: Tools, sports gear, seasonal items you actually use
- Relocate: Things that don’t belong in a garage (old paperwork, indoor items that migrated)
- Donate/sell: Duplicates, outgrown gear, the bread maker of garage items — things you haven’t touched in 2+ years
- Trash/recycle: Broken, dried-up, mysterious — be ruthless
Hazardous stuff (old paint, chemicals, batteries) goes to your local household hazardous waste collection — most municipalities take it free. This purge typically removes 30–40% of garage contents. Everything after this gets easier.
Step 2: Create Zones
Divide the garage into functional areas — this is the organizational insight that changes everything:
- Tools and workshop: One wall — pegboard, workbench, tool storage
- Sports and recreation: Bikes, balls, camping gear — near the door for grab-and-go
- Garden and yard: Near the yard-facing door — tools, soil, pots
- Seasonal/long-term storage: The least accessible spots — holiday decor, luggage
- Trash/recycling station: Defined spot, not drifting around
- Car space: Mark it with tape on the floor and defend it fiercely
Everything you own should belong to a zone. If it doesn’t fit a zone, question whether it belongs in the garage.
Step 3: Go Vertical (The Budget Superpower)
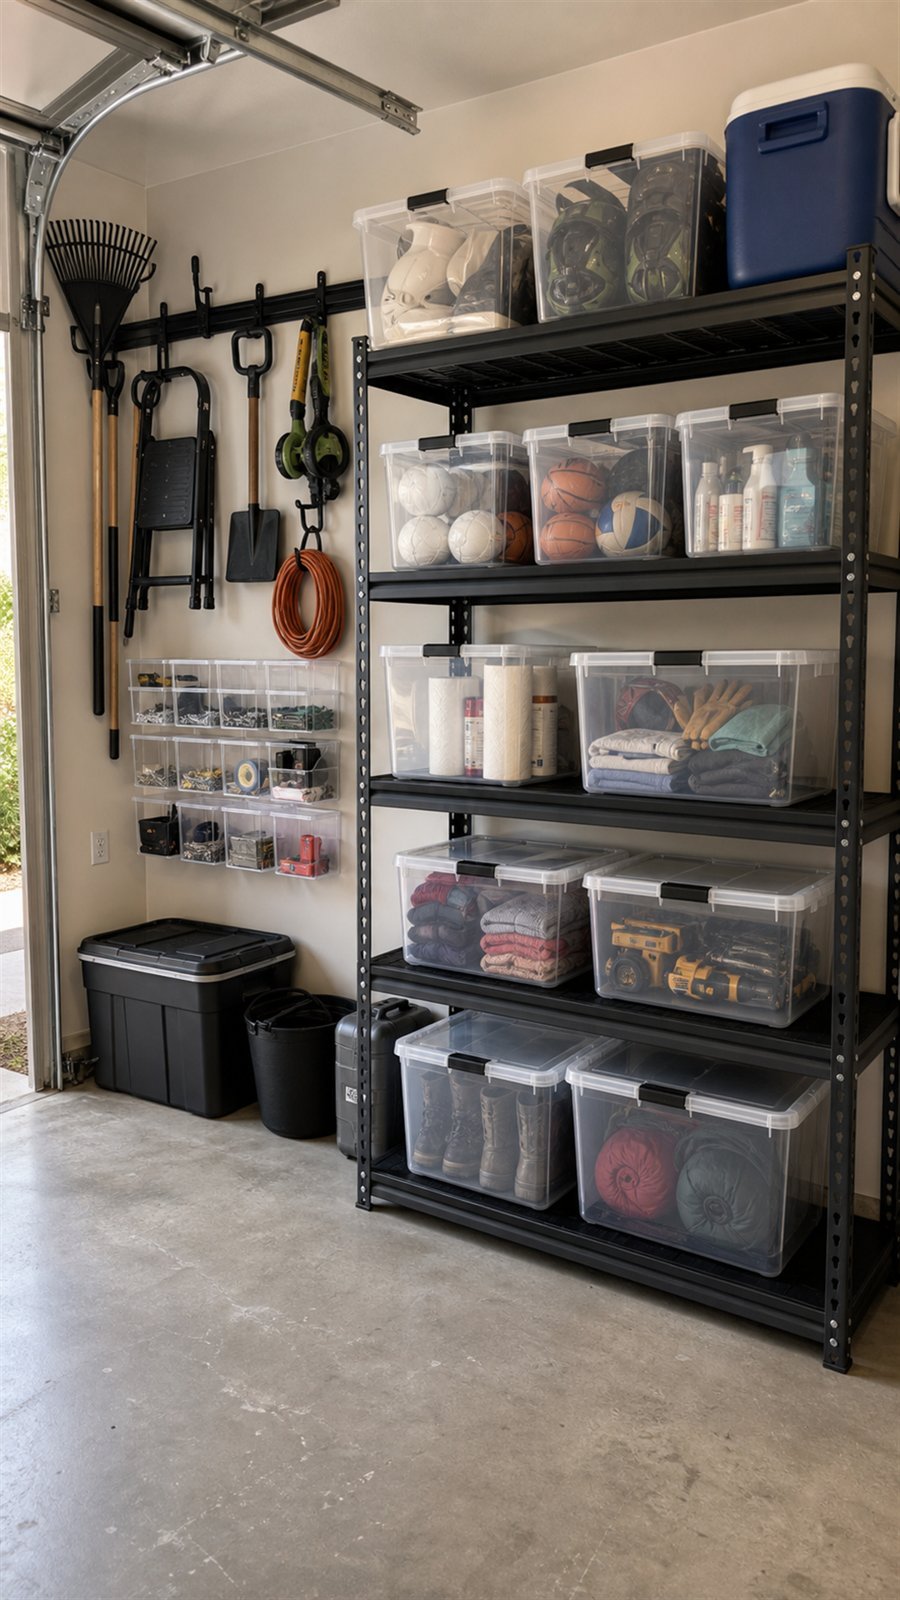
Garage floors are finite; garage walls and ceilings are vast. Budget vertical storage:
- Pegboard ($25–$40 per 4×8 sheet): The classic for hand tools. Hooks are cheap; outline tool shapes in marker for the satisfying “everything has a home” effect.
- Wall-mounted shelving: Heavy-duty brackets + 2×4 and plywood shelves cost a fraction of store-bought units and hold more. Mount with proper anchors — see our shelf-hanging guide (garage walls are often unfinished, making this even easier).
- Ceiling storage: Overhead racks ($60–$120 each) for seasonal bins and luggage — the ultimate “out of the way” storage. Ensure they’re lag-bolted into joists, not just drywall.
- Slatwall or track systems: More expensive ($100–$300 per section) but infinitely reconfigurable — hooks, baskets, and holders slide and lock.
- Magnetic strips for metal tools — $10, incredibly satisfying.
Step 4: Contain the Small Stuff
- Clear stackable bins ($8–$15 each) — clear so you can see contents; label everything anyway with a label maker or painter’s tape + marker.
- One bin per category — not “miscellaneous.” Car supplies, painting supplies, fasteners, electrical.
- Small parts organizers for screws, nails, bolts ($10–$20) — the junk drawer, civilized.
- 5-gallon buckets — free or $4 each, endlessly useful for garden tools, car washing supplies, sports balls.
Step 5: Handle the Awkward Items
- Bikes: Wall hooks ($10 each) or a ceiling hoist ($25) — floor-standing bikes eat shocking amounts of space.
- Ladders: Wall-mounted ladder hooks — get them off the floor. (And make sure it’s a safe one — see our ladder safety guide.)
- Sports balls: Bungee-cord corral on the wall — cheap, effective, oddly fun.
- Long tools (rakes, shovels): Wall-mounted tool rack or a simple 2×4 with slots — $10 in lumber.
- Folding chairs/tables: Wall hooks or a ceiling-mounted rack.
Maintain It: The 10-Minute Rule
Garages re-clutter by entropy. The defense: everything has a labeled home (so put-away takes seconds), and a 10-minute weekly reset — put wanderers back, break down one box, sweep. Also, enforce the one-in-one-out rule for garage categories. The system from our tiny laundry room organization scales perfectly to garage size.
Garage Flooring and Lighting: The Finishing Touches
Once organized, two upgrades make the garage feel like a real room instead of a concrete cave. Flooring: interlocking PVC or polypropylene tiles ($1–$3/sq ft) or epoxy coating ($3–$7/sq ft DIY kits) transform stained concrete into a clean, bright surface that’s easier to sweep and nicer to work on. Even just a thorough degrease and concrete paint ($30/gallon) is a massive improvement. Lighter floors reflect light, making the whole garage brighter.
Lighting: most garages have a single sad bulb. Swap it for 2–4 bright LED shop lights ($25–$40 each, linkable) and the space becomes genuinely usable after dark. Daylight-temperature bulbs (5000K) make it feel like daytime; motion-sensor versions mean never fumbling for a switch with full hands. Good lighting also makes the organization visible — which is the point of organizing in the first place.
These finishing touches run $150–$400 total and complete the transformation from “storage unit” to “workshop.” For layout inspiration, Family Handyman’s garage organization guides have detailed plans for every garage size and budget.
The Yearly Garage Reset
Even a well-organized garage drifts. Schedule one yearly reset — spring works well, when you’re already in cleaning mode. Pull the bins down, sweep everything, check for what crept in (the dead batteries, the mystery boxes, the “I’ll deal with it later” pile), and re-home or purge. It takes 2–3 hours once a year versus the full-weekend excavation every three years.
Seasonal swap discipline: when you pull down the holiday decorations, the summer gear goes up in the same motion — one trip, both directions. Label audit: labels fade and bins get repurposed; 5 minutes with the label maker yearly keeps the system legible. The broken-item rule: if something’s been “waiting for repair” for a year, it’s not getting repaired — decide: fix it this month or let it go. The reset is also the time to check for pests, water intrusion, and that the fire extinguisher is still charged.
The Bottom Line
The best way to organize a garage on a budget: purge ruthlessly first, create zones, go vertical with pegboard and wall shelves ($100–$200), contain small items in labeled clear bins ($50–$100), and mount the awkward stuff on walls and ceiling. Total: $200–$400 and a weekend. The result isn’t just a tidy garage — it’s a functional workshop, gear station, and (radical concept) a place you can actually park your car.