The moment your baby starts crawling, your house transforms into an obstacle course of hazards you never noticed: the knife block at toddler-eye-level, the cleaning products under the sink, the stairs that were charming last year. But childproofing doesn’t have to mean your home looks like a padded cell wrapped in plastic. With the right products — most of them invisible or actually attractive — you can make your home safe without sacrificing style. Here’s how to childproof your home without making it ugly.
The Design-Friendly Childproofing Philosophy
Two principles keep things beautiful: choose products that blend in (clear, white, or matching your hardware finish), and redesign zones rather than barricading everything. The goal isn’t to wrap the house in foam — it’s to make the dangerous stuff inaccessible and the accessible stuff safe. A home with thoughtful storage and a few well-chosen gates looks better than one with plastic latches on every surface.
Prioritize by real risk, not anxiety. The Consumer Product Safety Commission’s childproofing guide identifies the devices that actually prevent injuries — start there, not with every gadget on the baby aisle.
Room by Room: Invisible Safety
Kitchen
- Magnetic cabinet locks — the gold standard. Invisible from outside, opened with a magnetic key you keep on the fridge. No ugly plastic latches. (~$25 for a multi-pack)
- Move cleaning products and sharp tools to high cabinets permanently — the cheapest childproofing is reorganization
- Stove knob covers or a stove guard — clear covers that blend in; or remove knobs when not cooking
- Anti-scald faucet setting — lower your water heater to 120°F (also saves energy). While you’re at it, fix any dripping faucets.
Bathroom
- Toilet lock — slim, white, barely noticeable models exist
- Medications and razors go in a high locked cabinet, full stop — no product substitutes for inaccessibility
- Non-slip mats in the tub (choose a nice one, not the suction-cup monstrosity)
- Keep the bathroom door closed — a simple door lever lock ($10) beats every bathroom gadget combined
Living areas
- Anchor all furniture. Dressers, bookshelves, TVs — tip-overs kill. Furniture straps ($10–$15) are invisible behind furniture. This is the single most important childproofing task, period.
- Corner guards — clear silicone versions disappear against most furniture; use only on genuinely sharp corners at head height
- Outlet covers — sliding plate covers replace the plug-in caps (which are choking hazards themselves, ironically). They look like normal outlets.
- Cord management — blinds cords are a strangulation hazard; go cordless or use cleats. Bundle electronic cords out of reach.
Stairs
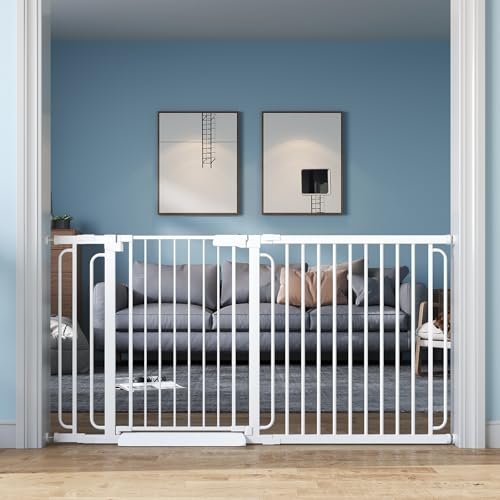
- Hardware-mounted gates at the top of stairs (pressure gates can fail — never at the top). Choose a modern metal gate in a finish matching your home — today’s gates look like design elements, not prison bars.
- Pressure-mounted gate at the bottom is fine.
Style-Smart Product Swaps
- Instead of: plastic table edge bumpers everywhere → Try: temporarily swapping a glass coffee table for an upholstered ottoman (doubles as storage, looks intentional)
- Instead of: visible cabinet latches → Try: magnetic locks or simply relocating hazards
- Instead of: ugly foam everything → Try: clear silicone guards only where needed
- Instead of: a playpen in the living room → Try: a well-gated “yes space” — one fully safe area where the child roams freely and you relax
The “yes space” concept is liberating: instead of making the whole house safe, make one area perfectly safe and gate it attractively. Less product, better looking, saner parents.
What Actually Matters Most (The Short List)
If you do nothing else:
- Anchor furniture and TVs to walls
- Hardware-mounted gate at top of stairs
- Lock up medications, cleaning products, and sharp objects (high + locked)
- Water heater at 120°F
- Cordless window coverings or secured cords
- Working smoke and CO detectors (check batteries!)
Everything else is optimization. These six prevent the injuries that actually send kids to the ER.
Childproofing for Different Ages
Childproofing isn’t one-and-done — the hazards change as kids grow. Crawlers (6–12 months): everything at floor level is the world. Outlet covers, furniture anchors, choking hazards (anything smaller than a toilet paper tube), and gates. Get on your hands and knees and see the house from 2 feet high — it’s eye-opening.
Toddlers (1–3 years): climbers and openers. Cabinet and toilet locks, stove guards, secured heavy furniture (they will climb the bookshelf), and water safety — bathroom doors closed and locked, always. This is peak childproofing intensity.
Preschoolers (3–5 years): they can defeat simple latches now. Upgrade to magnetic locks, teach the rules (stove is hot, medicine is never candy), and shift from barriers to education. Move medications and chemicals to high locked storage permanently — curious preschoolers are ingenious.
School-age: mostly about teaching — kitchen safety, what to do if home alone briefly, street safety. The physical products phase out; the lessons phase in. Revisit the setup every 6 months as abilities change — the gate that contained a crawler is a climbing frame for a toddler.
The Grandparents’ House Problem
Your house is childproofed. Grandma’s isn’t — and that’s where kids spend weekends. You can’t redesign someone else’s home, but you can manage the risk. Bring the essentials: a portable play yard for safe sleep, outlet covers for the rooms the child uses, and a door alarm ($10) for exterior doors. Do a 10-minute sweep on arrival: medications to a high shelf, cleaning products under the sink to on top of the fridge, small objects off the floor, and the bathroom door closed.
Have the conversation kindly: most grandparents childproofed decades ago (or never) and don’t realize how standards changed. Frame it as “the pediatrician says” rather than criticism. And supervise differently there — at grandma’s, the rule is eyes-on, always, because the environment isn’t controlled. It’s temporary vigilance, not permanent anxiety.
The Bottom Line
Childproofing your home without making it ugly comes down to invisible products (magnetic locks, sliding outlet covers, furniture straps), strategic reorganization (move hazards up high), and the “yes space” approach instead of barricading everything. Spend $100–$200 on the right products, anchor the furniture this weekend, and your home stays both safe and stylish. The baby years are short — design for them without designing around them permanently. And for the tech-inclined, smart home devices like video doorbells and smart locks add another layer of family-friendly convenience.