Tiny laundry rooms are a special kind of frustrating: the washer and dryer eat 90% of the floor, and the remaining sliver must somehow hold detergent, baskets, drying racks, and everything else. But small laundry spaces respond brilliantly to vertical thinking — literally. Most tiny laundry rooms have abundant unused wall and air space. Here’s how to add storage to a tiny laundry room without a renovation, using every inch you’ve got.
Think Vertical: The Walls Are Your Warehouse
The area above and beside the washer/dryer is prime real estate. Best options:
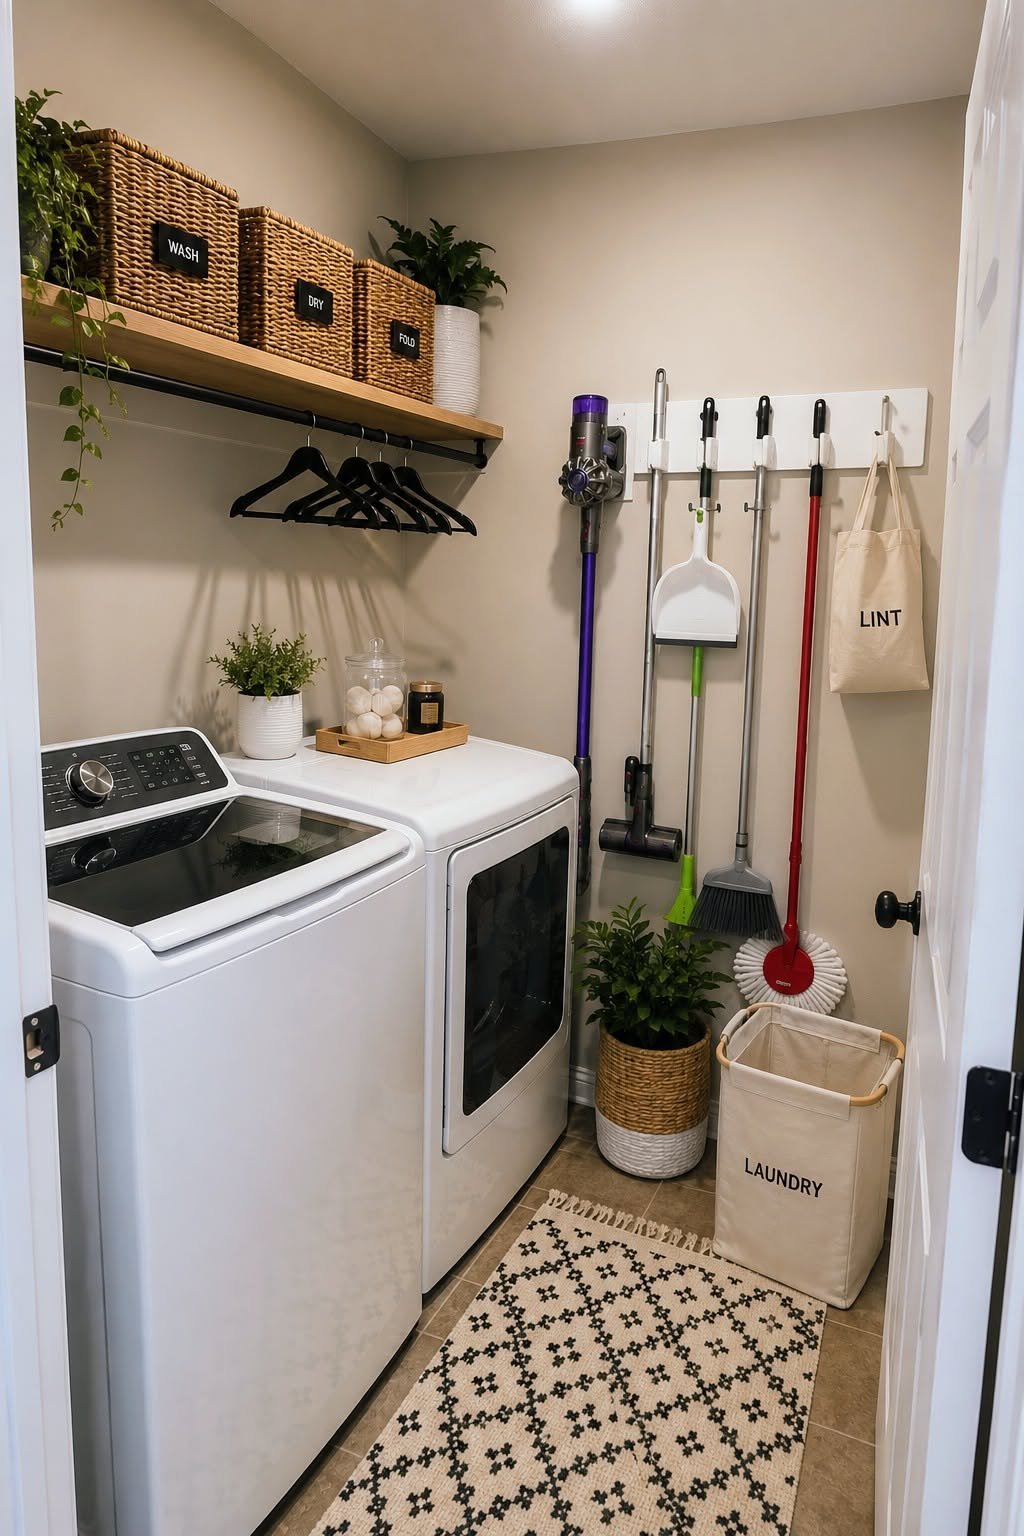
- Wall-mounted cabinets or open shelves above the machines. A $60–$120 stock wall cabinet from a home center, mounted with proper anchors (see our guide to hanging shelves without studs), instantly creates enclosed storage for detergents and supplies. Open shelves are cheaper and keep everything visible.
- A shelf spanning both machines. One long shelf or a butcher-block countertop laid across the washer and dryer creates a folding surface plus storage above — the single highest-impact upgrade for front-loaders.
- Pegboard on any free wall. Infinitely reconfigurable hooks for ironing tools, lint rollers, stain sticks, and bags. A 2×4 foot pegboard costs ~$25 and holds an absurd amount.
- Magnetic strips or magnetic containers on the side of the machines for small metal items — dryer sheets, stain remover pens.
- Over-the-door organizers on the laundry room door (or any nearby door) for cleaning supplies, with zero wall damage.
Claim the Forgotten Spaces
Tiny rooms hide storage in overlooked spots:
- The 6-inch gap beside the machines: slim rolling carts ($25–$40) fit exactly here and hold detergent bottles, perfect for the narrow canyon between washer and wall.
- Above the door: a shelf above the door frame holds rarely-used items (extra linens, seasonal stuff).
- Behind the door: hooks or a narrow rack for the ironing board, broom, and drying rack.
- Under a countertop: if you add the spanning counter, the knee-space beneath (on front-loaders) fits pull-out baskets.
- The ceiling: a retractable clothesline or wall-mounted accordion drying rack folds flat when not in use — drying space without floor space.
Contain and Categorize
In small spaces, containers aren’t just organization — they’re architecture:
- Decant detergents into matching pump bottles or jars. It looks better and the uniform containers stack efficiently. Label everything.
- One bin per category: stain treatment, delicates bags, dryer supplies, cleaning rags. When every item has a labeled home, the room stays functional.
- Stackable baskets for sorting — a 3-tier rolling sorter ($40–$60) replaces three sprawling hampers.
- Collapsible everything: folding drying racks, collapsible hampers, fold-flat ironing boards. If it doesn’t collapse, question whether it belongs in a tiny room.
Make It Brighter and More Functional
Tiny laundry rooms are often dark afterthoughts, which makes them feel even smaller:
- Upgrade the light. A bright LED flush-mount ($30) or even stick-on motion-sensor lights inside cabinets ($15) transforms usability.
- Light paint color — if the walls are dark or dingy, a quart of bright white paint ($15) makes the room feel twice as big. (Our small-room paint color guide applies here too.)
- Add a small counter or shelf at standing height for treating stains — bending over the machines gets old.
- A pretty touch: a framed print, a plant that tolerates humidity, matching containers. You’ll spend hours here weekly; make it pleasant.
The same brightening principles in our dark living room guide work in miniature here.
Sample Layouts for Common Tiny Configurations
Closet laundry (stacked units): Shelves on the side walls, over-door organizer on the closet doors, slim cart beside the stack if there’s a gap. Everything vertical.
Galley laundry (machines on one wall): Spanning countertop over front-loaders, wall cabinets above, pegboard on the opposite wall, rolling sorter at the end.
Laundry corner (no dedicated room): A freestanding shelving unit beside the machines, attractive containers (it’s visible!), and a curtain or folding screen if you want it hidden.
Making the Laundry Itself Easier
Storage is half the battle; the other half is the laundry workflow. A few upgrades that pay off daily: sort at the source — a divided hamper in each bedroom (lights/darks/delicates) eliminates the weekly sort-a-thon. Treat stains immediately with a stain stick kept right in the laundry room (not under the kitchen sink where you’ll never use it) — fresh stains come out; set stains don’t.
Learn your machine’s settings: most people use exactly one cycle for everything. Delicates last twice as long on gentle; towels need hot water and an extra rinse; washing in cold with the right detergent cleans normally-soiled clothes fine while saving energy and preventing fading. The ENERGY STAR program’s laundry guidance confirms cold-water washing with modern detergents is effective for most loads.
Clean the machines themselves: run an empty hot cycle with washing machine cleaner monthly (front-loaders especially — they grow mildew in the gasket), and clean the dryer lint trap every load plus the vent duct yearly. A clogged dryer vent is a fire hazard and doubles drying time — the $15 vent brush is the highest-ROI cleaning tool you own.
Dealing With Laundry Room Moisture
Laundry rooms are humid by nature — washers, dryers, and damp clothes pump moisture into small spaces. Unchecked, that means musty smells, mildew on walls, and in bad cases, mold. Ventilate: if there’s an exhaust fan, run it during and after laundry; if not, crack the door. Dryers must vent outside — a dryer venting into the room (or a disconnected vent hose) is a moisture disaster and a fire risk. Check the vent connection yearly.
Don’t leave wet clothes sitting — in the washer (mildew in hours) or in hampers (same). Move loads promptly. Wipe the washer gasket (front-loaders) and leave the door ajar between uses — the sealed drum stays damp otherwise. A small dehumidifier ($40–$60) in a chronically damp laundry room pays for itself in prevented mildew and fresher-smelling clothes.
The Bottom Line
Adding storage to a tiny laundry room is a $100–$300 project, not a renovation: wall cabinets or shelves above the machines, a spanning countertop for folding, slim carts for the gaps, pegboard for tools, and containers for everything. Go vertical, claim the forgotten inches, and make it bright. The room stays the same size — but it’ll hold twice as much and feel twice as pleasant. The same organizing principles apply at larger scale in the garage.