Your attic is the thermal equivalent of leaving a window open all winter — except it’s invisible, so nobody thinks about it. In most older homes, the attic is under-insulated, which means your expensive heated air rises straight through the ceiling and out the roof. The fix is one of the highest-ROI projects in homeownership, and it’s very DIY-able. Here’s how to insulate an attic cheaply without cutting corners that matter.
First: Know What You’re Working With
Pop your head into the attic (with a mask — old insulation dust is nasty) and assess:
- Current depth and type: Measure insulation depth. If you can see the tops of the ceiling joists, you’re under-insulated — that’s the telltale sign.
- Target depth: Most climates need R-38 to R-60, which means 12–18 inches of blown cellulose/fiberglass or equivalent batts. Check the DOE insulation recommendations for your zone.
- Air leaks first: Before adding insulation, seal the penetrations — plumbing stacks, electrical wires, recessed lights (use proper covers — standard insulation against non-IC-rated cans is a fire hazard), the attic hatch, and top plates. Insulation slows heat; air sealing stops it. Do the sealing or you’re insulating a sieve. Our energy upgrades guide covers air sealing in detail.
- Ventilation check: Soffit vents must stay clear — insulation stuffed into eaves blocks airflow and causes moisture/ice dam problems. Install baffles ($2–$3 each) at every rafter bay before insulating.
- Moisture issues: Fix roof leaks and bathroom fans venting into the attic (a shockingly common mold factory) before insulating. Insulating over moisture problems seals them in.
The Cheapest Good Method: Blown-In Cellulose (DIY)
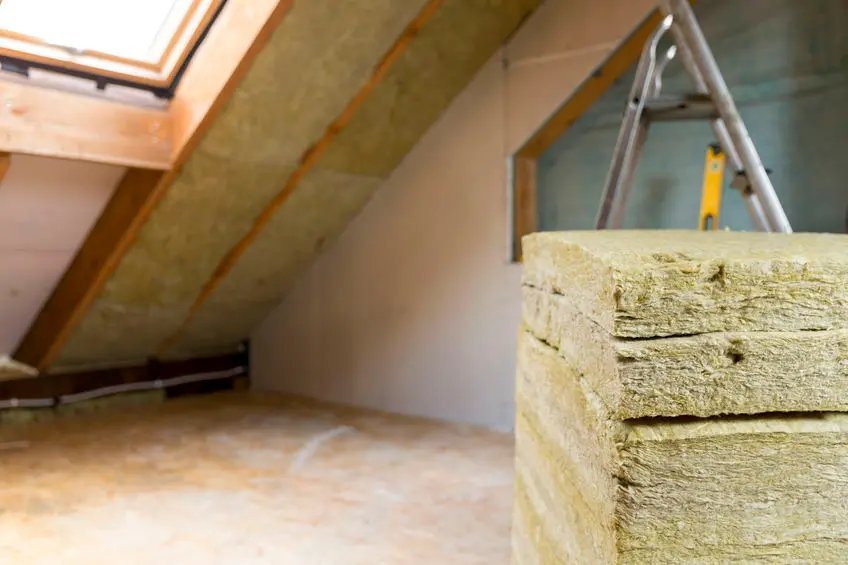
Blown cellulose is the budget king of attic insulation. Made from recycled newspaper treated with fire retardant, it costs roughly $0.50–$1.00 per square foot DIY — a typical 1,000 sq ft attic runs $500–$1,000 in materials. And here’s the beautiful part: most home centers lend you the blower machine free with a minimum insulation purchase (usually 10+ bags).
The process:
- Seal air leaks and install baffles (the unglamorous prep — don’t skip).
- Have the store load bags into your vehicle; set up the blower outside with the hose fed into the attic.
- One person feeds bags into the hopper, one person in the attic directs the hose — keep the hose moving for even coverage.
- Work from the far corners back toward the hatch so you don’t trap yourself.
- Use depth markers (or a ruler) to verify even coverage to your target R-value.
- Insulate the attic hatch itself — glue rigid foam to the hatch panel and add weatherstripping around the frame.
Two people, one day, very DIY-friendly. Wear a respirator, goggles, long sleeves, and a headlamp — attics are miserable environments, but it’s one day.
Alternative: Fiberglass Batts (Simpler, Slightly Pricier)
Batts are the familiar pink rolls. Pros: no machine needed, easy to handle, simple to install between joists. Cons: harder to get complete coverage (gaps and compression kill performance — a batt squeezed into a too-small space loses R-value), and layering batts over existing insulation requires running the second layer perpendicular. Cost: roughly $0.75–$1.50/sq ft DIY. Good choice for: topping up specific areas, or attics with easy access and simple geometry. For tricky spots, blown insulation fills gaps batts can’t.
What NOT to Skimp On
- Air sealing: Worth repeating — $100 in caulk and foam before insulating saves more than an extra 6 inches of insulation after.
- Baffles at the eaves: $30 total, prevents moisture disaster. Non-negotiable.
- Recessed light covers: If you have non-IC-rated cans, they need proper fire-rated covers with clearance — not insulation piled on top. This is a safety issue, not a budget line.
- Depth: Don’t stop at “looks like a lot.” Measure. R-38 minimum in most zones; the bags have coverage charts — follow them.
- Protective gear: Respirator (not a dust mask), goggles, gloves. Old insulation may contain who-knows-what; new cellulose is dusty. Your lungs are worth $30.
DIY vs. Pro: The Math
DIY blown cellulose: $500–$1,000 for a typical attic. Professional blown-in: $1,500–$3,500. The pro premium buys speed, even coverage, and not spending a Saturday in a hot attic. Honestly? This is one of the most DIY-friendly major upgrades — the machine does the work, and perfection isn’t required (even coverage matters more than artistry). But if your attic has vermiculite insulation (possible asbestos — get it tested before disturbing), knob-and-tube wiring, or major access issues, call a pro.
Check for utility rebates and federal tax credits before buying — insulation incentives are common and can cut 20–30% off the cost. The ENERGY STAR rebate finder lists what’s available in your area.
Insulating the Rest of the Attic: Hatch, Ducts, and Knee Walls
Blown insulation on the attic floor gets the glory, but three often-missed spots leak significant energy. The attic hatch/scuttle: an uninsulated hatch is a 2×2-foot hole in your insulation. Glue 2-inch rigid foam to the hatch panel (R-10+), add weatherstripping around the frame, and consider an insulated hatch cover tent ($50–$80) for pull-down stairs — those are even worse than hatches.
Ductwork in the attic: if your HVAC ducts run through unconditioned attic space, seal every joint with mastic (not duct tape), then wrap with R-6 or R-8 duct insulation. Leaky attic ducts waste 20–30% of your heating/cooling before it reaches the rooms — sealing them is often the highest-ROI hour in the whole attic project.
Knee walls (short walls in finished attics or bonus rooms): insulate them like exterior walls (R-13+ batts with the backing facing the conditioned space), add rigid foam sheathing on the attic side, and make sure there’s blocking to prevent wind-washing. These forgotten walls are frequently completely uninsulated in older homes.
The Bottom Line
The cheapest effective way to insulate an attic: seal air leaks first, install eave baffles, then blow in cellulose yourself with a free loaner blower — $500–$1,000 total for a typical home, one weekend, 2–5 year payback in most climates. It’s sweaty and itchy for a day, then invisible savings for decades. Pair it with sealed windows and the rest of our energy-efficient upgrades, and your old house starts behaving like a modern one — at a fraction of the cost.