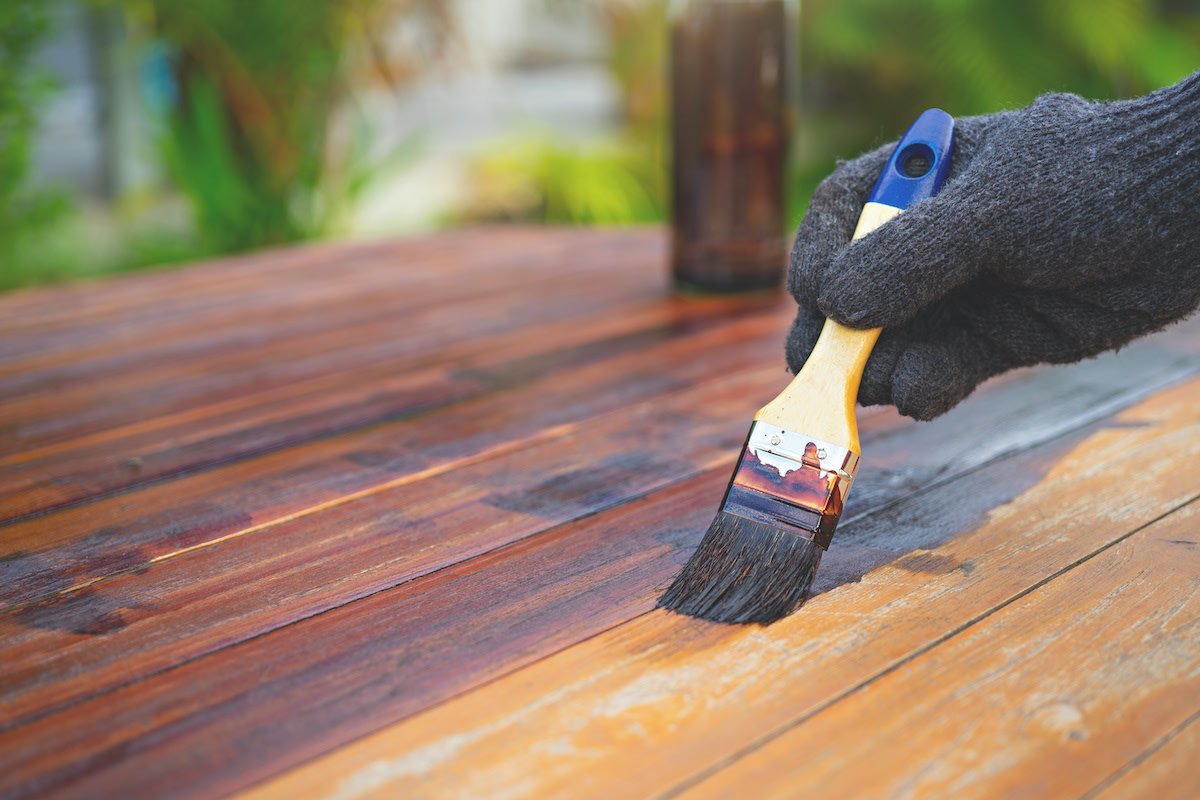
A freshly stained deck is one of the most satisfying home transformations — weathered gray boards become rich, warm wood that makes the whole backyard feel new. But deck staining is also one of the most commonly botched DIY projects: peeling, blotchy, sticky finishes that fail within a year. The difference between a stain job that lasts three years and one that fails by fall is almost entirely preparation and conditions, not the stain brand. Here’s the right way to stain a wooden deck, step by step.
Step 1: Pick the Right Stain (This Matters More Than You Think)
Deck stains fall into three categories:
- Transparent/clear: Shows all the wood grain, minimal UV protection, lasts 1–2 years. Best for new, beautiful wood you want to show off.
- Semi-transparent: The sweet spot for most decks — shows grain while adding color and solid UV protection, lasts 2–3 years. My recommendation for most homeowners.
- Solid/opaque: Looks like paint, hides the grain, maximum protection, lasts 3–5 years. Best for older, weathered decks with imperfections to hide. (But once you go solid, you’re committed — it’s hard to go back.)
Oil-based vs. water-based: Oil penetrates deeper and is more forgiving to apply; water-based dries faster, cleans up easier, and holds color longer. Modern water-based stains have closed the quality gap significantly. Either works — just don’t layer one over the other without checking compatibility.
Buy quality stain from a paint store, not the cheapest big-box option. The $20/gallon difference buys you an extra year or two of life — the best ROI in the project.
Step 2: Prep Like Your Stain Job Depends on It (It Does)
Clean thoroughly. Sweep, then wash with a deck cleaner (oxygen bleach-based cleaners are effective and wood-safe) and a stiff brush or pressure washer on a low setting. Too much pressure gouges wood — keep it under 1,500 PSI, fan tip, 12+ inches away, moving with the grain. Let the deck dry 48–72 hours. Staining damp wood traps moisture and guarantees peeling.
Sand strategically. You don’t need to sand the whole deck to bare wood, but knock down rough spots, splinters, and any glossy areas. 60–80 grit on a pole sander for the field, hand-sand railings. Always sand with the grain.
Repair first. Replace rotted boards, re-drive popped nails (or replace with deck screws), tighten loose railings. Stain won’t fix structural issues — it just makes them prettier temporarily.
Strip old failing stain if the previous coat is peeling. Staining over peeling stain gives you… more peeling stain. A chemical stripper plus pressure washing resets the surface.
Step 3: Wait for the Right Weather
This is where most DIY jobs fail. Stain needs:
- Temperature: 50–90°F (check your specific product — most want 50°F+ for 48 hours)
- No rain for 48 hours after application — check the forecast obsessively
- No direct hot sun during application — stain dries too fast and won’t penetrate. Work in morning/evening shade, following the shade around the deck.
- Low humidity if possible — high humidity slows curing
The ideal: an overcast, 65°F weekend with no rain forecast. Plan around the weather, not your calendar.
Step 4: Apply It Right
- Stir, don’t shake. Shaking creates bubbles that become finish flaws.
- Work in small sections — 2–3 boards at a time, full board length, to avoid lap marks where wet meets dry.
- Brush, don’t just spray. Sprayers are fast but stain needs to be worked into the wood. If you spray, back-brush immediately — every professional does this.
- Thin coats. Deck stain should penetrate, not sit on top. If it’s pooling or puddling after 15 minutes, you’ve applied too much — brush it out or wipe excess.
- Do railings and verticals first, then the deck floor — drips land on unfinished surfaces.
- Two thin coats beat one thick coat for solid stains; one proper coat is usually right for transparent/semi-transparent (check the can).
This Old House’s deck staining guide has a good video of the back-brushing technique if you want to see it in action.
Step 5: Maintain It (The Part Everyone Skips)
- Keep the deck clean — sweep regularly, wash annually. Dirt and mildew degrade stain.
- Move planters and furniture occasionally — trapped moisture underneath accelerates wear.
- Touch up high-traffic areas yearly rather than waiting for total failure — maintenance coats are 10x easier than full strips.
- Re-stain on schedule: transparent every 1–2 years, semi-transparent every 2–3, solid every 3–5. The water-bead test tells you when: if water no longer beads, protection is gone.
Deck Staining vs. Painting: Making the Call
At some point every deck owner faces this fork: re-stain or switch to paint? Stain (especially semi-transparent) shows wood grain, won’t peel (it fades instead, which is easier to recoat), and is simpler to maintain — but offers less UV protection and needs redoing every 2–3 years. Paint (or solid stain) gives maximum protection and color options, lasts 4–5+ years, but will eventually peel — and peeling paint on a deck is miserable to strip.
My take: if your deck wood is in good shape and you like the natural look, stick with semi-transparent stain and accept the 2–3 year cycle — maintenance coats are easy. If the wood is weathered, mismatched from board replacements, or you want a specific color, solid stain is the compromise: paint-like coverage and protection with better adhesion than actual paint on horizontal surfaces.
Never use interior paint or wall paint on a deck — it’s not formulated for foot traffic, UV, or standing water, and it fails fast and ugly. Deck-specific products only, on horizontal surfaces that take a beating.
The Bottom Line
The right way to stain a wooden deck: choose semi-transparent stain (for most decks), prep obsessively (clean, dry 48+ hours, sand, repair), wait for ideal weather (50–90°F, no rain, no direct sun), apply thin coats with back-brushing, and maintain annually. The stain brand matters less than the preparation — a $40/gallon stain applied right outlasts a $70/gallon stain applied wrong. Do it right and your deck looks incredible for years; and a great-looking deck does wonders for curb appeal and home value too.