Dark spots — sun spots, acne marks, melasma patches — are among the most common skin concerns, and also among the most frustrating to cover. Too little product and they peek through by noon; too much and you look caked. The secret professional makeup artists know: covering dark spots isn’t about heavier foundation, it’s about color correction, targeted concealing, and layering in the right order. This step-by-step guide gives you the exact technique, the products that matter (and the ones that don’t), and the mistakes that make spots more obvious instead of less.
Step 1: Prep the Canvas (Skincare Before Makeup)
Makeup sits on skin, not instead of it — and dark spots cover far better on hydrated, smooth skin. Start with your normal routine: gentle cleanser, moisturizer suited to your skin type, and sunscreen (always, but especially important here — UV exposure darkens hyperpigmentation, undoing your coverage work from underneath). Let each layer absorb for a minute.
If your spots are texturally raised or flaky, gentle exfoliation 2–3 times weekly helps makeup lie flat — but never exfoliate aggressively right before makeup application. And keep the broader routine simple and consistent; proper skin care for your skin type does more for how makeup looks than any primer. The American Academy of Dermatology’s guidance at aad.org covers the fundamentals that make every makeup step work better.
Step 2: Color Correct (the Step Beginners Skip)
This is the professional secret that changes everything. Dark spots aren’t just “dark” — they have undertones, and the color wheel is your weapon:
Peach/salmon corrector: For blue-purple dark circles and deep hyperpigmentation on light to medium skin. This is the workhorse corrector for most dark spots.
Orange corrector: For dark spots and hyperpigmentation on medium-deep to deep skin tones, where peach isn’t pigmented enough to neutralize.
Yellow corrector: For mild redness and dullness around spots; less crucial for dark spots specifically.
Green corrector: For red acne marks (not brown spots) — only if the spot is actively red.
Apply corrector ONLY on the spot itself with a small brush or fingertip, patting (never rubbing) — you’re neutralizing the discoloration, not painting the whole area. Work in natural daylight or with a daylight-balanced mirror light if possible; warm indoor lighting hides the very undertones you’re trying to neutralize. This single step does half the covering work, which means you need half the concealer later. That ratio — more correction, less concealer — is what separates natural-looking coverage from the mask effect.
Choosing the Right Corrector Formula
Cream correctors in pots offer the most pigmentation for stubborn spots; liquid correctors blend more easily for larger areas like melasma patches. For deep skin tones, look for correctors specifically formulated with enough pigment — many mainstream “universal” correctors are too sheer to neutralize rich hyperpigmentation. Test in natural light, not store lighting.
Step 3: Conceal With Precision (Less Than You Think)
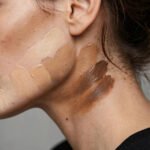
Now — and only now — concealer. Choose a shade matching your skin exactly (not lighter; lighter concealer on a dark spot creates a gray, ashy cast that draws more attention). Full-coverage creamy formulas work best; apply with a small flat brush or fingertip directly over the corrected spot, then blend only the edges into surrounding skin, leaving the center undisturbed.
The technique that matters: stipple, don’t swipe. Pressing/stippling deposits product; swiping drags it away. Build in two thin layers rather than one thick one — thin layers look like skin, thick layers look like makeup. Let the first layer set for 30 seconds before adding the second. For spots across larger areas (melasma, widespread sun damage), a medium-coverage foundation applied first, then spot-concealing on what’s left, is more efficient than concealing everything individually.
Step 4: Set It So It Lasts All Day
Unset concealer migrates, creases, and fades by afternoon — setting is what makes morning work survive until evening. Lightly press translucent setting powder over concealed spots with a damp sponge or small brush (pressing, again, not sweeping). For oily skin or humid climates, a setting spray after powder adds insurance.
The order that locks everything: color correct → conceal → set → then apply the rest of your makeup (blush, bronzer, etc.) over the top. Doing blush before setting disturbs the concealed areas. And carry blotting papers, not powder, for midday touch-ups — layering more powder over existing makeup causes the cakiness you’re trying to avoid.
The Long Game: Treating While You Cover
Makeup covers; treatment fades. The ingredients with real evidence for dark spots: vitamin C (antioxidant brightening), niacinamide (pigment transfer inhibition), azelaic acid (gentle and pregnancy-safe), and retinoids (cell turnover) — plus sunscreen, always sunscreen, since UV is the engine driving most hyperpigmentation. The FDA’s cosmetics resources at fda.gov help you evaluate product claims critically. Cover confidently today, treat patiently for tomorrow, and the spots genuinely diminish over months.
Step 5: The Mistakes That Make Spots Worse
Shade too light: The #1 error — creates gray cast. Match your skin, correct the color underneath instead.
Skipping color correction: Forces you to use 3x the concealer for worse results.
Rubbing instead of patting: Moves product off the spot you just covered.
Heavy foundation everywhere: Blanket coverage looks mask-like; targeted concealing looks like great skin. Use foundation for overall tone, concealer for spots — different jobs, different products.
Skipping sunscreen: Every unprotected sun exposure deepens the spots you’re working to hide. Non-negotiable.
Conclusion
Covering dark spots with makeup step by step means: prep hydrated skin, color-correct the specific undertone (peach/salmon or orange for most dark spots), conceal with exact-shade product using stippling in thin layers, and set with pressed powder. The professional ratio — more correction, less concealer — is what makes coverage look like skin instead of makeup. And while you cover today, treat with proven brightening ingredients and religious sunscreen, because the best coverage is the spot that fades.
Frequently Asked Questions
What color corrector should I use for dark spots?
Peach or salmon for light to medium skin tones; orange for medium-deep to deep skin tones. These warm tones neutralize the blue-brown undertones of hyperpigmentation. Green is only for red marks, not brown spots.
Should concealer be lighter or darker than foundation for dark spots?
Match your skin tone exactly — not lighter. Lighter concealer over dark spots creates a gray, ashy cast that draws more attention to the area. Do the neutralizing work with color corrector underneath instead.
How do I make concealer stay on all day?
Layer thinly (two thin layers, not one thick), let each layer set 30 seconds, then press (don’t sweep) translucent powder over the top. Setting spray adds extra longevity for oily skin or long days.
Can makeup actually worsen dark spots?
Makeup itself doesn’t worsen hyperpigmentation, but skipping sunscreen under makeup does — UV exposure deepens dark spots even through windows and on cloudy days. Always wear SPF 30+ as your base layer, reapply when spending extended time outdoors, and remove makeup thoroughly each night. For more detail on a related topic, see our article on the best way to remove wrinkles without an iron.
What ingredients actually fade dark spots over time?
Vitamin C, niacinamide, azelaic acid, and retinoids have the strongest evidence, but all require consistent use over 8–12+ weeks — and all are undermined without daily sunscreen, since UV drives the pigmentation process.